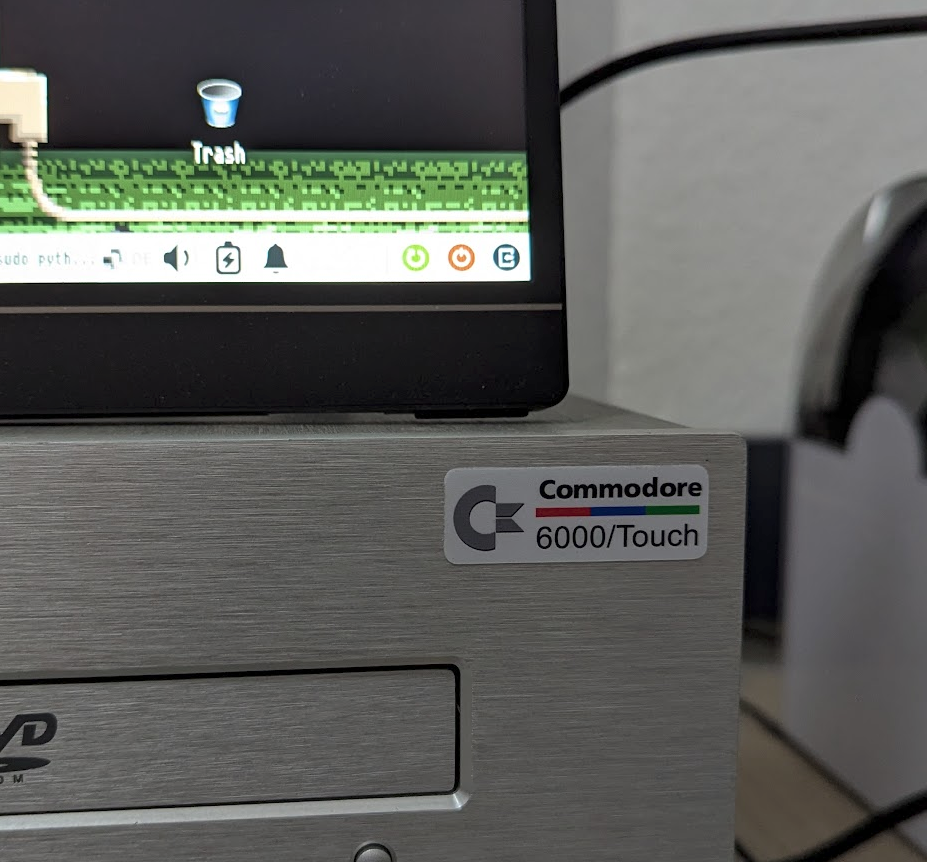
To enhance our presentation at events like the “Amiga Ruhrpott Convention” or the “AmigaXY”, our mate McDope setup a dedicated demonstration kiosk. He named it “Amiga 6000/Touch”, in a homage to classic desktop Amigas – since it’s using a desktop style case as well, just with a special gimmick. Of course it’s not a real Amiga model, instead it’s an emulation based system. The name “Amiga 6000” was chosen simply because the 4000 was the last one, it’s a desktop case and 5000 sounds and looks weird.
You will be able to see it on the ARC³ and the Amiga40.
So what is the Amiga 6000 actually?
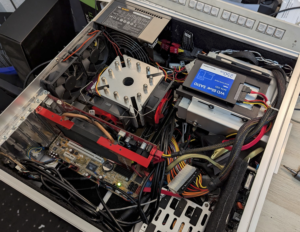
It’s a custom built PC, in a HTPC desktop format case. In case you don’t know the term HTPC: it was a fad some years ago, “Home Theater PC” – often these came bundled with Windows Media Center Edition. The intention was to deliver a PC that’s silent and “not ugly” enough, that you would put it into your living room. If you care about details, look it up – it would exhaust the scope of this article.
The case is an OriginAE X15e, full Aluminum and featuring a touchscreen in the front. That touchscreen is a core element of our demo kiosk, providing a selection of video and interactive demos of misc. software by AmiDev and/or ALB42. In example AmiFox and AmiTube.
The details
In that case we have a simple ASUS Mainboard, featuring an Athlon64x2 4200+ (overclocked to be an Athlon64x2 5000+), 4GB DDR2-800 Memory and a 500GB SATA SSD for storage. Additionally it features a DVD drive, card reader, remote control and Firewire – all of them unused (so far) 😅. Since the onboard graphic refused to do HDMI I had to put a graphics card in there. Luckily there was still an Geforce 8800GT around – which is “a bit” of overkill for an emulated Amiga but well… Actually, I’ve took it from my daughters PC – but she got my old GTX1060 instead 😂.
For the base system of the Amiga 6000 I’ve chosen AmiKit – the bootable edition. Basically that is Debian Bookworm with AmiKit and Themes pre-installed, which gives an Amiga Look even on the Linux side. A dd image was taken from the USB, flashed to the SSD, aaaaand… it didn’t worked 😅.
Since AmiKit bootable requires a system having EFI (that’s the “requires a kinda modern system” bit in the documentation), it was necessary to chroot into the system and install a non-EFI grub version to be able to boot. After that hassle was solved, a new image was taken from the SSD, and rightfully so. I had to reflash it multiple times because of stuff I’ve tried. For example: when I’ve tried to installed the original touch screen driver, I had no touch input at all anymore – even after removing everything done by the installer. Similar stuff happened when I’ve tried installed the nvidia legacy binary driver for the 8800GT, Xorg was kinda messed up. But to be clear: that is NOT the fault of AmiKit but of the drivers.
Who needs drivers (or calibration)?
Like stated above, installing the manufacturers driver for the Touchscreen was sadly a no-go. To add insult on top of that: the touchscreen IS SUPPORTED by opensource drivers out of the box. Buuuuut:
- X and Y are switched, meaning the horizontal axis on events is actually the vertical and vice versa
- as if that is not annoying enough, the Y Axis (the real one, so X in Hardware/Driver) is inverted – so if you touch the top you actually get the highest value and if you touch at the bottom you get 0
There are calibration options for that but as soon as I used those, the touch wasn’t limited to the touchscreen anymore and went all over the place.
Well, it’s a system for demonstrating custom software. Why not write custom software for the touchscreen?
Exactly, I also couldn’t find a reason to not go that way 😁. Esp. since the selection menu would require a custom app anyway. So what I’ve done is writing a small Python app. That app is using GTK3 to draw two buttons for each product we want to demonstrate, one for a video and one for an interactive demo. Additionally it’s using Linux APIs to grab the touch device, translating the touch coordinates into the actual screen coordinates and faking a click on the correct button the user have actually touched.
For my defense: it’s not as complicated at it sounds and was actually way faster done then all my attempts at configuring the screen properly.
But how to start selected programs in the emulated Amiga?
AmiKit relies on a folder in your home directory that is mounted as drive in the emulated Amiga. So my touchscreen application is writing the command to launch into a file that is also visible to the Amiga. On the Amiga there is another program running, kindly provided by ALB42, which monitors if that file exists. If it exists: execute the content and delete it again.
Tada, done.
In case you’re curious enough to read crappy code: all source code is available in my Dropbox.
The result
The result is a desktop system, running a well-integrated Amiga emulation and having a touchscreen where you can select either a video demo, or an interactive demo of software like AmiFox.
If you select a video demo, it will start in the native Linux host system else it will start in the AmiKit emulated environment. The touchscreen will show a boing ball while the video is playing, or the program is being launched in the Amiga.
To finish up the look I’ve created a wallpaper just for the Amiga 6000 which is basically a 1920×1080 variant of the AmiFox boxart. I’ve added QRCodes for our Discord (discord.amitu.be) and Amitopia.com though.